I wear them under dresses to keep from flashing the world as I'm up and down with the babies. I wear them with long shirts to make a perfect outfit. I wear them to workout in. Aaaand I wear them just to wear them, because leggings.
Making your own is super easy and fun! You can make in any print or color you want!
I am going to be using the Peg Leg pattern from Patterns for Pirates. Bonny Legs from Made for Mermaids is a girls pattern that goes together the same.
Print and assemble your pattern, and pick out and prep your fabric.
You will want nice and stretchy knit fabric with 4-way stretch, meaning it stretches both with and against the grain. Fabric with at least 5% Lycra/spandex should be used for at least the waistband to keep them up.
For a refresher about cutting your fabric look here.
Cut your pieces out. You should have 2 legs, cut mirror images, and 1 waistband.
When I sew, I always have the directions for the pattern pulled up on my laptop or ipad so i can follow along as I go.
Instead of doing a memory hem first, I go ahead and hem the legs first.
I measure 1 inch from the bottom and fold the bottom edge to meet the 1 inch mark.
That creates a 1/2 inch fold.Then sew it up with a stretch stitch.
For hemming I use #01, which is a straight stretch stitch. For all other seams I use #10. If you do not have either of these stitches you can use a regular zig zag stitch, or look in your machine's manual for the best stretch stitch to use.
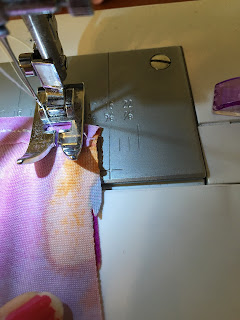
Next, you will sew up your leg seams, as per the directions, with right sides facing. Easy peasy. You need to use a 1/2" seam allowance. Use the markings on your machine to guide you.
Legs all sewn up, now you need to cut off your seam allowance. This will keep your seams from being too bulky.
Now turn one leg right side out, and put the 1 leg that is right side out inside of the other leg lining up all the edges. I missed the flipping of 1 leg on my first pair and ended up with funky looking pants!
Sew up that curved seam, as per the directions, and trim off your seam allowance. Eek! ALMOST DONE!!
Sew up the short sides of your waistband with right sides together. Trim seams. Then fold the band so the wrong sides are together.
To mark the band in quarters put a pin on each end and fold it in half. Put a pin on each side of the middle fold. When you unfold it, you will have your quarters.
To mark quarters on your pants, pull the front up so that the top edges match up. Place a pin on the front and back seam and one on each side.
Put the waist band around the pants (right side out) lining up the raw edges and your 1/4 pins. You will want to line up the seam of your band with the seam on the back of the pants. The waist band is going to be smaller than the pants. That's how they will stay up when you're wearing them! You will need to stretch the band to fit as you sew, which is very hard to get a picture of! It won't look exactly like my picture when you stretch, but similar. On this step, I use the free arm feature of my machine to loop the fabric around and sew in a circle. Trim seams.
Now you're Done! You made leggings!! Woohoo!!! I knew you could do it!!
PS
It's ok if you made mistakes. I have made a bunch of these, and I messed up too!! That's how you learn!
I had my bobbin come undone and ended up with a funky loopy hem. I also ended up putting the band seam on the side instead of the back. Whoops!!


1 comment:
Hahaha you are great! I will totally be coming back to this for help!
Post a Comment