Blog Archive

Monday, September 26, 2016

SCRUNDIES!!!!

Did you know you can make your own undies?! I mean, who wouldn't want undies that match their outfits?!

I am using the Scrundlewear pattern from Stitch Upon A Time. There are lots of different options with this pattern including briefs, boy shorts, knit bands, and more.

You want a fabric with 35% stretch for the main body of your undies. You can upcycle t-shirts into undies! If you are doing knit bands you will want a fabric with at least 5% spandex/lycra for the bands so your undies stay up. Most of the time I use up scraps by making scrundies.

When you print your pattern, I would start by printing the size you would fit in based off of your measurements. A lot of times people have to size down, but it's easier to start with your measured size so you know what needs changed for the next pair. 

Once you get your pattern printed, assembled, and cut out, you're ready to cut your fabric. Follow the cutting directions on the pattern pieces. If you are doing the knit band option, the measurements for the bands are written on the pattern itself. You will not find a separate piece for the bands. If you needs some help with cutting you can look here.

I am making the knit band version of boy shorts. 14 pairs of boy shorts to be exact.


The pattern directions have you start with assembling the body first, but I start with the bands first. I feel like it goes faster this way, but I don't know if it really does or not.

Pin all your bands, with right sides together and the short sides lined up.


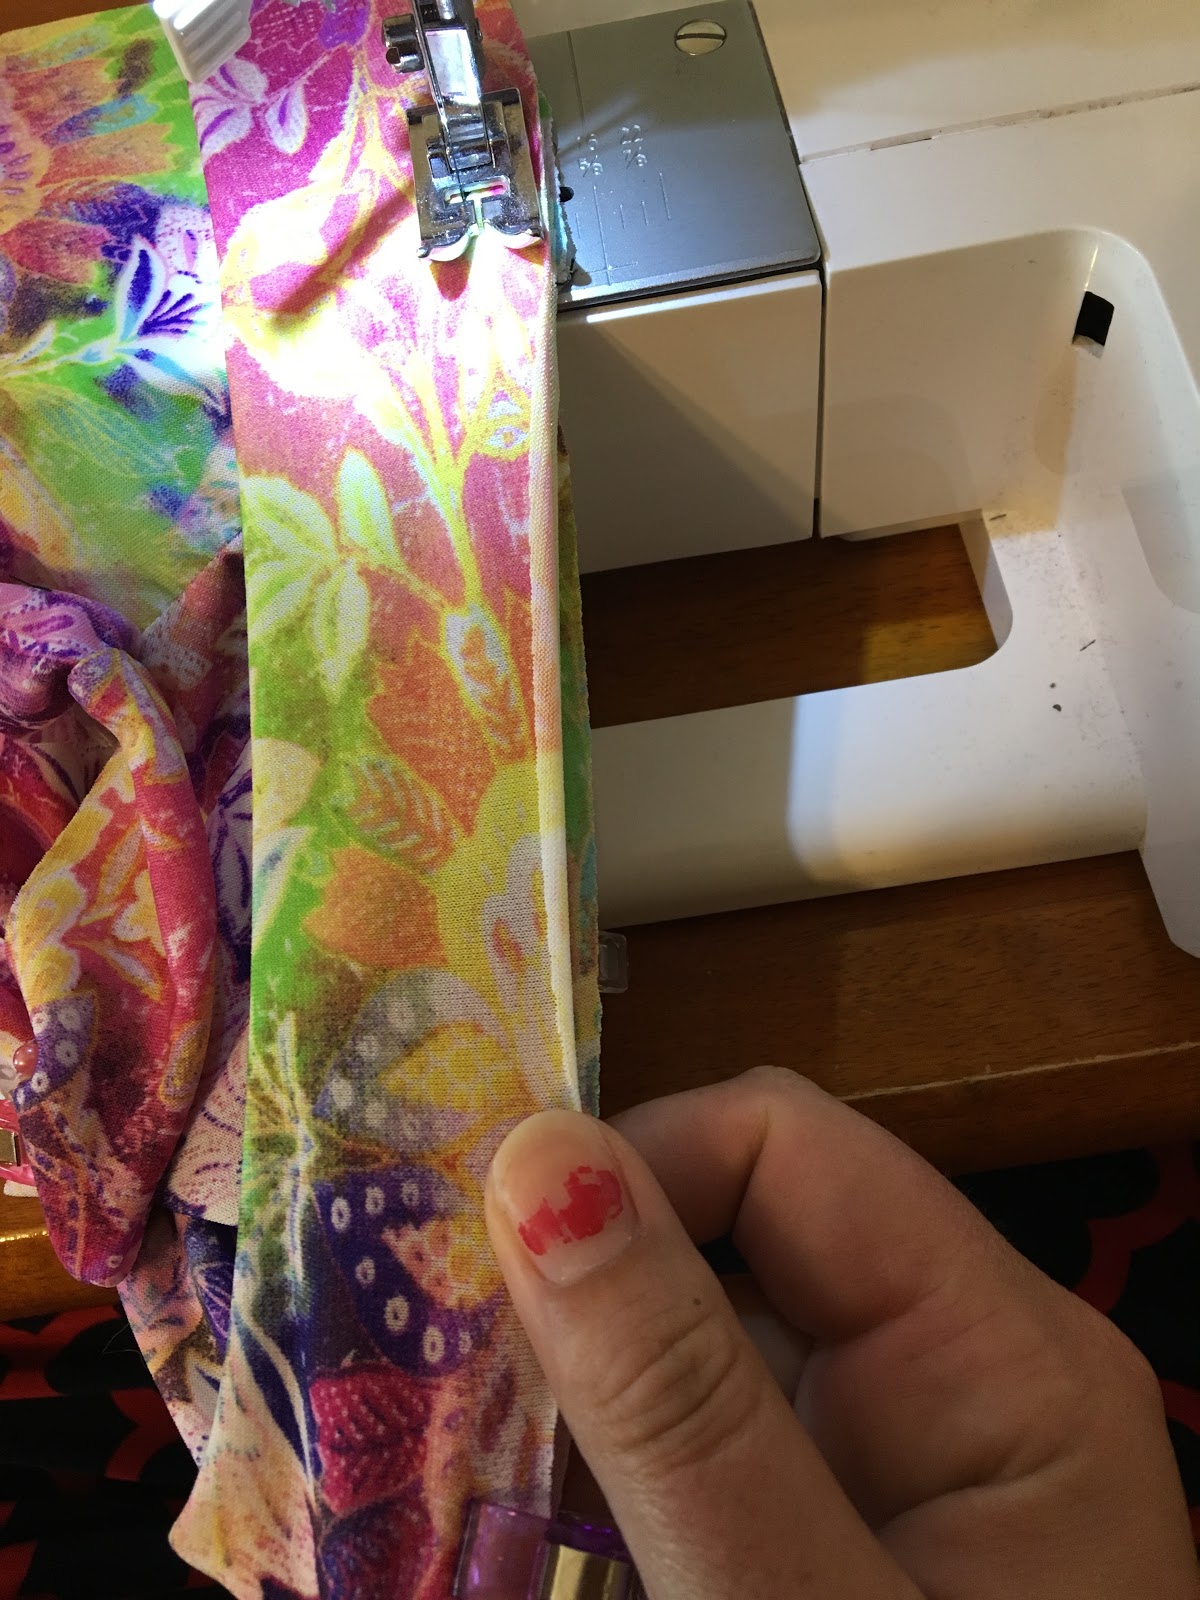
Sometimes machines like to eat your fabrics. To prevent this, without needing to buy a walking foot, pull the threads taught as you begin sewing. Works like a charm!


Sew together using a 1/2" seam allowance, and trim off the excess.


Next assemble the body. Lay your front piece with the right side up. Lay the back piece on top right side down, lining up the bottom. Put the lining piece on top of that with the right side down, and pin all 3 layers together at the bottom. 

Note that I do not serge or top stitch the top of the liner. Knit fabric does not fray, and I find it much more comfortable to not have the extra stitching there.


Now, pull up your back piece enough to line up the sides, and pin together.


Sew the sides and bottom using a 1/2" seam allowance, and then trim off the excess, just like you did with the bands. 


Easy peasy so far right?! Almost looks like undies already!

Here is where it gets a bit tricky, but take your time and you will do great.

Flip your lining so it goes over your seam, and pin it to your front piece with wrong sides together.


Time to get bands on!

Fold your band in half, wrong sides together, lining up the raw edges.


 Pin in 4 equal parts. The easiest way is to place a pin on the seam, and then one on the other end. Fold the band in half, lining the short sides up, and place 1 pin on each side of the fold. Unfold it and it should look like this. Repeat for both leg bands and waistband.

We need to mark 4 equal places on the body now to. Lay them flat, and then line up the raw edges of the leg hole. place a pin on each end, and then fold in half to mark the center, just like we did with the bands. Repeat for the other leg, and the top.


To put the band on, slide the band over the body, with right sides facing. Line up your 4 pins, and pin in place. Your band will be smaller than the hole, so don't panic, you haven't messed up.


To attach the bands you will need to stretch the bands while you sew so they line up with the body. Be careful here not to stretch the fabric of the body. Go slow and keep checking that you are sewing through all the layers. 


Once you attach your bands trim off your excess seam allowance. 

Guess what?! You're done! Aren't they cute?! 


I can't wait to see what everyone makes! The sky is the limit with this pattern!

Coming next: See what I'm making for the upcoming birthdays in our family! American Girl dolls will rejoice!

Monday, September 12, 2016

One Mama Sweat Shop

With six people in our family, someone always wants or needs something made. I figured out a way to easily have  several projects going at once without getting all messed up.

This weekend we went to Iowa to watch my cousin, who plays for the Montana Grizzlies, play football. None of my kids' Griz shirts from previous seasons fit, so I needed to make them new ones. In order to not look too cult like with the kids all matchy I wanted to make them different styles. The boys ended up getting the same style shirt, but its HARD to find variety when sewing for boys! I also had some other projects to get done, so I knew I was going to be a busy mama for a few days!

Here's a look at my process:

I have to take everything one stage at a time. Sometimes all I can do is one stage a day.'

The first step of any project is fabric selection and cutting. I will haul out all my fabric for my chosen projects, and get out the necessary patterns to get down to work. *If I have not printed or assembled my pattern yet I typically will do this the night before after the kids are all in bed.*

Here I have all my projects cut. I am making a Grandpa Cardi, 2 Sleep Sacks, 2 5k tees, a Janey Jump Around Dress, a Flora Top, a pair of Max Joggers, and 2 pairs of Bonny Legs. *I will list links at the bottom of this post so you can make your own :)*

Before I start sewing anything up I will prioritize the projects. For these ones I started with the cardigan, because I was doing it as part of a sew-a-long. Then I moved onto the sleep sacks and 5k tees since I had 2 of each to make. I saved the Bonny Legs for last because they weren't an actual NEED. Then I moved onto the dress, since I hadn't made one yet and it seemed difficult. Flora after that since it is a dolman and very easy. 

The cardigan kicked my butt! So many pieces! I think I over complicated it a bit too. It took my 2 days to complete it considering I only get to sew during nap times, so not too bad. 


My lovely photographer, Lena, was playing with the neighbors, so Bobby had to take the pictures for me. His pictures tend to always make me look crazy like I escaped the looney bin and stole an old lady's sweater on my way out. The cardigan looks, fits, and feels great, despite my disheveledness!

The Sleep Sacks I modified to not have zippers, but instead snapping shoulder straps. The only reason behind that is because I didn't have any super long zippers on hand. Talk about an easy sew! I'm sure they will be more difficult with the zipper, but that's only because zippers are the devil... I  will be sharing pictures once I know they work!

Making 2 or more of the same pattern is typical for me, whether it  is because the twins are getting the same style outfit, or the boys and girls are getting matching style outfits. When I do more than one at a time I will do the first step on each item, followed by the second step on each, and so on. Assembly line! This makes it pretty quick to crank out projects.

Moving onto the 5k tees. I chose to color block them, which I have only done once before, so it was nice to have an easy project between the cardigan and the tees. The good news is that they went together pretty easily. The only problem I ran into was my bobbin coming undone, so there is a loopy hem on one of Max's sleeves. I don't think he will notice... These were fun to make, despite the challenge, because I got to try something new. Faux layered sleeves! Perfect for football season!

Miss Madelynn's Janey Jump Around looked a lot more challenging in the directions than it actually was. Probably would have been even easier if I didn't attempt to sew it up with all the kids home and running around. The first step went well, then I sewed the neckband to the wrong side!! Seam ripping is a big part of learning. Mistakes happen, no big deal. HOWEVER, seam ripping a three step zig-zag/overcast stitch, is the WORST! It took me an hour to rip that sucker out! Once I got it all ripped and then sewn to the correct side the dress went together very easily. I am pleased with how it turned out.


I mentioned that the Flora was a dolman earlier. That means that the sleeves are attached, and not separate pieces sewn on later. The sleeves are typically wider on a dolman than those with separate sleeves. 

When I first saw this pattern I knew it would be one that Lena would love. It is a women's pattern, but she can fit in the XS! I chose to make her the tunic length, because she hates wearing jeans and would prefer to be in leggings all the time. The concept of leggings-are-not-pants is not one she chooses to wrap her brain around. Tunics and dresses are the best options for her to keep her booty covered!

The Flora took me no time to sew up. It probably took about 30 minutes start to finish. It was so easy, and I love the style of it! Making one for myself is already in my mental sewing queue. 


Next up is Max Joggers for Mr. Max. these are a wonderfully fast sew. 


Once I finished all of these projects I still had 3 days before we were leaving for Iowa, so I got to making the leggings for the girls.

I am borrowing a serger from my neighbor, and I hadn't gotten to use it yet. Leggings were the most logical first project! An hour figuring out how to thread it, and half a day working on the tension, I was ready to go!

Bonny Legs go together the same as the Peg Legs we made earlier. Nice and quick, especially with a serger! Madelynn's took me maybe 5 minutes! Since they were so quick, I had to hurry up and cut myself out some too. I couldn't let the girls be the only ones with new leggings!


Lena's have a black waistband because I used a fabric with high spandex content for the waist. The gray fabric on hers have no spandex in them. If I had used the gray fabric for the waistband they would have just stretched out and fallen off. 

Last step before heading to Iowa was to draw on the Griz shirts. I cannot draw well, but I made a great attempt! 


They are far from perfect, but made with love and that makes them pretty special to me! 

We couldn't get any pictures of the kiddos in their shirts before the game, but we tried to get some after we got back to the hotel post-game. 


They got their shirts signed, and added some chocolate ice cream spots to their shirt, so they look a bit different than when the day started!

Go Griz!! #HeldForHeisman

As promised, Here are the links to the above mentioned patterns:

Happy sewing!!

Coming soon: SCRUNDIES!!!!


Wednesday, September 7, 2016

Fun Fact #3!

You CAN use the big cones of serger thread on your regular sewing machine! 

The cones are wound differently than the smaller spools of thread you would normally use on your machine, so its not as easy as just putting it on your machine. Its easier!

You can buy a thread stand that you can put behind your sewing machine for relatively cheap, but here's a free solution:

First, put the thread cone on the floor, or on surface much lower than your machine.


Next, run the thread behind your machine, and thread it as normal.


That's it!!

Pretty exciting huh?!

Coming soon: See what I have been working on over the last week!